
Kenmore Stackable Washer and Dryer Manual: A Comprehensive Guide

Welcome! This manual provides detailed instructions for Kenmore stackable units, covering installation, operation, troubleshooting, and maintenance. Explore features designed for ease and efficiency.
Understanding Your Kenmore Stackable Unit
Kenmore’s commitment to appliance innovation spans over a century, offering reliable solutions for modern homes. Your stackable washer and dryer represent this dedication, combining efficiency with advanced cleaning technologies. The Kenmore family includes standard Kenmore models, Kenmore Elite with enhanced features, and Kenmore PRO for demanding needs.
These units are designed for versatility, saving space while delivering powerful performance; Understanding the specific features of your model – identified by its serial and model numbers – is crucial. Kenmore incorporates technologies like Quad Action Impeller and varied wash motions (spraying, agitation) to optimize cleaning. This guide will help you unlock the full potential of your appliance, ensuring years of dependable service.
Model Identification and Serial Numbers
Locating your Kenmore stackable washer and dryer’s model and serial numbers is essential for accessing support, warranty information, and replacement parts. These numbers uniquely identify your specific unit. Typically, you’ll find a label containing this information on the appliance itself.
For the washer, check inside the lid, around the door opening, or on the back panel. For the dryer, look inside the door, on the back panel, or sometimes behind the lint filter housing. Record both the model and serial number in a safe place. Having these readily available will streamline any service requests or inquiries with Kenmore Customer Care, ensuring efficient assistance.
Safety Precautions
Prioritize safety when installing and operating your Kenmore stackable washer and dryer. Always disconnect power before performing maintenance or cleaning. Never attempt to repair the appliance yourself; contact qualified service personnel. Ensure proper ventilation for the dryer to prevent fire hazards.
Keep children and pets away from the appliances during operation. Do not overload the washer or dryer, as this can cause damage or injury. Use only detergents and fabric softeners recommended for these appliances. Avoid using flammable materials near the dryer. Regularly inspect cords for damage and replace if necessary. Following these precautions ensures safe and reliable performance.

Installation Guide
Proper installation is crucial for optimal performance. Begin by ensuring a level and stable surface. Connect the washer to a dedicated water supply and drain line, verifying no leaks. Electrical connection requires a grounded outlet matching the appliance’s specifications. Carefully remove all shipping materials before proceeding.
Refer to the detailed diagrams included for correct hose and vent connections. Ensure the dryer vent is unobstructed and meets local codes. Before stacking, confirm both units are properly leveled. Use the provided stacking kit for secure attachment, following the instructions precisely. Double-check all connections before powering on the units.
Preparing the Installation Area
Before installation, thoroughly prepare the designated space. The floor must be level and capable of supporting the combined weight of both units, especially when filled with water and laundry. Ensure sufficient clearance around the appliances for proper ventilation and access for maintenance.
Verify the availability of necessary utility connections: a dedicated water supply with appropriate shut-off valves, a drainpipe capable of handling the washer’s discharge, and a grounded electrical outlet matching the dryer’s voltage requirements. Remove any obstructions and protect the flooring with a suitable covering during installation to prevent damage.
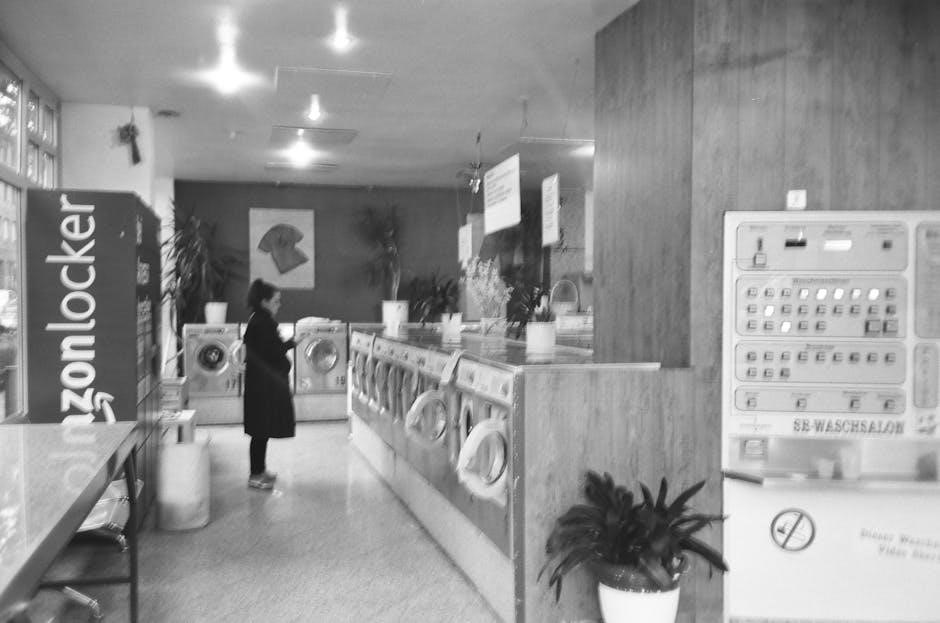
Stacking the Washer and Dryer
Carefully lift the dryer and position it directly onto the washer, ensuring proper alignment of the mounting brackets. Secure the units using the provided stacking kit – this is crucial for stability and safety. Tighten all screws firmly, following the kit’s instructions precisely.
Double-check the stability of the stacked unit by gently rocking it. If any wobble is detected, re-tighten the screws or adjust the leveling feet on the washer. Avoid forcing the units together; proper alignment is key. A correctly stacked unit minimizes vibration and maximizes space efficiency.
Washer Operation
Begin by sorting your laundry and checking garment care labels. Load the washer, avoiding overloading to ensure optimal cleaning performance. Add detergent according to the dispenser guide, selecting the appropriate amount based on load size and soil level.
Familiarize yourself with the control panel to select the desired wash cycle. Kenmore washers offer various cycles, including delicate, normal, and heavy-duty. Press the start button to initiate the wash cycle. The washer will automatically fill, wash, rinse, and spin. Always ensure the water supply hoses are connected securely before operation.
Control Panel Overview
The Kenmore washer’s control panel features a digital display and intuitive buttons for cycle selection, temperature adjustment, and spin speed control. Cycle selection buttons allow you to choose from pre-programmed washes like Normal, Delicates, Bulky/Sheets, and Quick Wash. Temperature options include Hot, Warm, and Cold, catering to different fabric types.
Spin speed controls range from Low to High, impacting moisture removal. Additional options may include delay start, extra rinse, and soil level selection. Indicator lights display the current cycle status – washing, rinsing, spinning, or completed. Refer to the full manual for detailed explanations of each function.
Wash Cycle Selection
Kenmore washers offer a variety of wash cycles to accommodate different fabric types and soil levels. The Normal cycle is ideal for everyday laundry, while Delicates provides gentle cleaning for fragile items. Bulky/Sheets handles larger loads like comforters and towels effectively; Quick Wash offers a faster cycle for lightly soiled clothes.
Heavy Duty tackles tough stains and durable fabrics. Permanent Press minimizes wrinkles in synthetic materials. Sanitize utilizes higher temperatures for enhanced cleaning and disinfection. Always consult garment care labels before selecting a cycle to prevent damage. Experiment to find the optimal settings for your laundry needs.
Detergent Dispenser Guide
Your Kenmore washer features a multi-compartment dispenser for detergent, fabric softener, and bleach. The main wash compartment (often marked with “I” or a symbol of a wash basin) is for detergent used during the main wash cycle. The pre-wash compartment (marked “II”) is for detergent used in a pre-wash cycle, ideal for heavily soiled items.
The fabric softener compartment (usually marked with a flower symbol) dispenses softener during the final rinse cycle – do not overfill. The bleach compartment (marked with a triangle symbol) is for liquid chlorine bleach; never mix bleach with other detergents. Always follow detergent manufacturer’s instructions for proper dosage.
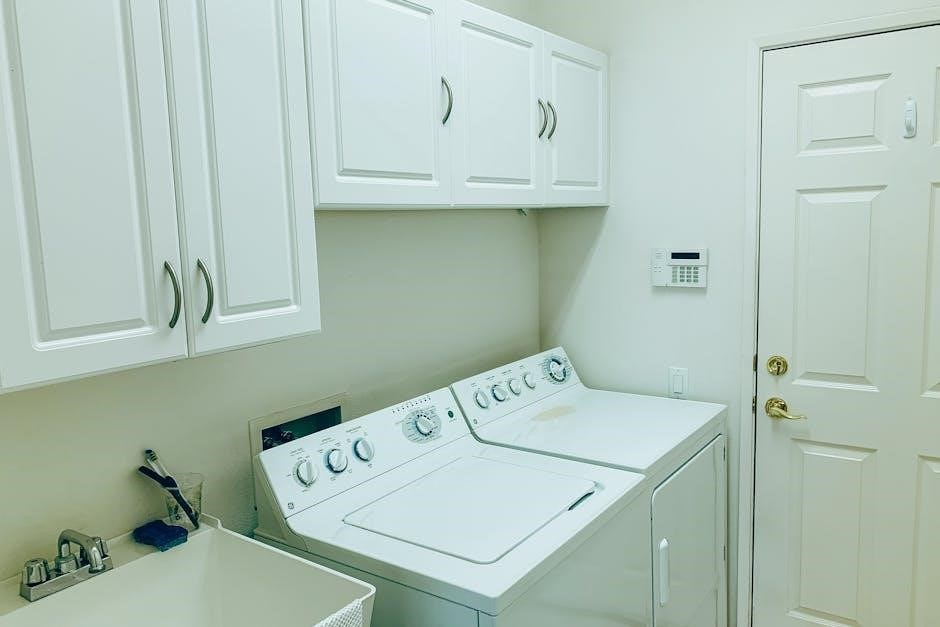
Dryer Operation

Operating your Kenmore dryer is straightforward, offering a range of cycles to suit various fabrics. Before each use, ensure the lint filter is clean for optimal performance and safety. Select the appropriate drying cycle using the control panel – options typically include automatic, timed dry, delicate, and bulky items.
Automatic cycles sense moisture levels to prevent over-drying, while timed dry cycles allow you to set a specific drying duration. Steam cycles (on Elite models) refresh and de-wrinkle clothes. Always check garment care labels before selecting a cycle. Proper loading ensures even drying and prevents damage.
The Kenmore dryer’s control panel is designed for intuitive operation. A cycle selector dial allows you to choose from pre-programmed drying cycles like Normal, Delicate, Bulky/Sheets, and Timed Dry. Temperature settings – High, Medium, Low, and Air Dry – provide customized heat levels.
Option buttons offer additional features such as Wrinkle Shield, Sanitize, and Damp Dry. Digital displays (on Elite models) show cycle time remaining and selected settings. Indicator lights signal cycle status – running, completed, or paused. Familiarize yourself with each button and setting for efficient and effective drying.
Drying Cycle Selection
Kenmore dryers offer a variety of cycles to suit different fabric types and drying needs. The Normal cycle is ideal for everyday cottons and linens. Delicate cycles provide low heat for sensitive fabrics like lingerie and silk. Bulky/Sheets accommodates larger items like comforters and blankets.
Timed Dry allows you to set a specific drying duration. Sanitize uses high heat to eliminate bacteria. Wrinkle Shield periodically tumbles clothes after the cycle ends to minimize wrinkles. Always check garment care labels before selecting a cycle to prevent damage. Proper cycle selection ensures optimal drying performance and fabric care.
Lint Filter Maintenance
Regular lint filter cleaning is crucial for dryer efficiency and safety. A clogged filter restricts airflow, increasing drying time and posing a fire hazard. Locate the lint filter, typically inside the dryer drum near the door. Remove the filter after each load and clean it thoroughly.
Use your fingers or a soft brush to remove lint. Avoid using water or chemical cleaners. Inspect the filter housing periodically for any accumulated lint. A clean lint filter ensures optimal performance, reduces energy consumption, and prevents potential fire risks. Prioritize this simple maintenance task for safe and efficient operation.
Troubleshooting Common Washer Issues
Encountering problems with your Kenmore washer? This section addresses frequent issues. If the washer won’t drain, check the drain hose for kinks or obstructions. Ensure the drain hose isn’t inserted too far into the drainpipe. For a washer that won’t spin, verify the lid switch is functioning correctly – it must register as closed.
An unbalanced load can also prevent spinning; redistribute items evenly. Check the water inlet hoses for proper connection and water supply. Consult the error code section of this manual for specific diagnostic information. If issues persist, contact Kenmore Customer Care for assistance.
Washer Not Draining
A common issue is a washer failing to drain properly. First, verify the drain hose isn’t kinked or blocked – straighten it and remove any obstructions. Ensure the hose isn’t inserted too deeply into the standpipe, as this can cause siphoning. Check the drain pump filter for lint, coins, or other debris; it’s usually located behind an access panel.

Confirm the drain pump is functioning by listening for a humming sound during the drain cycle. If no sound is heard, the pump may be faulty. Also, inspect the water level switch; a malfunctioning switch can prevent the drain cycle from initiating. If problems continue, consult a qualified technician.
Washer Not Spinning
If your Kenmore washer isn’t spinning, several factors could be at play. Begin by checking for an unbalanced load – redistribute items evenly within the drum. Verify the lid switch is functioning correctly; the washer won’t spin if it thinks the lid is open. Inspect the drive belt for wear or breakage; a damaged belt will prevent drum rotation.
A faulty motor coupling can also cause this issue, connecting the motor to the transmission. Listen for a humming sound; if present, the motor may be attempting to spin but is blocked. If no sound is heard, the motor itself might be defective. For persistent issues, professional repair is recommended.
Troubleshooting Common Dryer Issues
Encountering problems with your Kenmore dryer? Common issues include lack of heat, failure to tumble, or excessive noise. First, always check the power supply and ensure the dryer is properly plugged in. A clogged lint filter is a frequent culprit for poor performance; clean it before each use. Inspect the vent hose for obstructions – a blocked vent restricts airflow and can cause overheating.
If the dryer isn’t heating, a faulty heating element or thermostat may be to blame. For tumbling issues, examine the drive belt and motor. Unusual noises often indicate worn bearings or a damaged drum. Refer to the error codes section for specific diagnostics.
Dryer Not Heating
If your Kenmore dryer isn’t producing heat, several factors could be responsible. Begin by verifying the power supply and ensuring the dryer isn’t in a ‘no heat’ cycle. A blown thermal fuse is a common cause – this safety device protects against overheating. Inspect the heating element for breaks or damage; a faulty element won’t generate heat.
Also, check the gas valve (for gas dryers) and igniter for proper operation. A malfunctioning thermostat can also prevent heating. Always disconnect power before inspecting internal components. Consult the error code section for specific diagnostic codes related to heating failures. Professional repair may be needed for complex issues.
Dryer Not Tumbling
If your Kenmore dryer drum isn’t rotating, first ensure the dryer isn’t overloaded. Check the drive belt for breakage or slippage – a broken belt will immediately stop tumbling. Inspect the motor for signs of failure; a faulty motor won’t drive the drum. Verify the drum rollers are functioning smoothly; worn rollers can cause resistance.
A clogged lint filter can sometimes contribute to tumbling issues by restricting airflow. Examine the blower wheel for obstructions. Always disconnect power before accessing internal components. Refer to the error code section for potential diagnostic codes. Professional service might be necessary for motor or complex mechanical repairs.
Maintenance and Cleaning
Regular maintenance extends the life of your Kenmore stackable unit. For the washer, run a cleaning cycle monthly with a washer cleaner to remove residue. Wipe down the drum and door seal after each use. Inspect and clean the detergent dispenser regularly to prevent clogs; For the dryer, clean the lint filter after every load – this is crucial for safety and efficiency.

Periodically vacuum the dryer vent to prevent fire hazards and maintain airflow. Wipe down the exterior of both units with a damp cloth. Avoid harsh chemicals or abrasive cleaners. Proper care ensures optimal performance and prevents costly repairs.
Washer Cleaning Procedures
To maintain peak performance, clean your Kenmore washer monthly. Utilize a washer cleaning product specifically designed for HE machines, following the product’s instructions. Run a hot water cycle on the longest setting with the cleaner. Alternatively, use two cups of white vinegar. After the cycle, wipe down the drum interior with a clean cloth.

Don’t forget the dispenser! Remove and rinse the detergent and fabric softener dispensers, removing any built-up residue. Inspect the door seal for mold or mildew and clean with a diluted bleach solution (1 part bleach to 10 parts water). Leave the door ajar after cleaning to allow for ventilation.
Dryer Cleaning Procedures

Regular dryer cleaning is crucial for safety and efficiency. After each load, clean the lint filter thoroughly – a clogged filter reduces airflow and poses a fire hazard. Periodically (every 6 months), inspect and vacuum the lint trap housing to remove any accumulated lint.
Annually, clean the dryer vent duct. Disconnect the duct from the dryer and use a vent cleaning brush kit to remove lint buildup. Ensure the exterior vent flap opens freely. Wipe down the dryer’s exterior with a damp cloth. Avoid harsh chemicals that could damage the finish.
Kenmore Elite vs. Kenmore PRO
Kenmore offers three lines: Kenmore, Kenmore Elite, and Kenmore PRO, each catering to different needs. Kenmore PRO models are built for durability and heavy-duty performance, often favored by larger households. They prioritize robust construction and powerful cleaning capabilities.
Kenmore Elite appliances offer a balance of advanced features and reliability. Expect innovations like steam cycles and specialized wash/dry options. The standard Kenmore line provides dependable performance at a more accessible price point. Choosing depends on your budget and laundry demands – Elite offers more features, while PRO prioritizes power.
Warranty Information and Customer Care
Kenmore stands behind its products with comprehensive warranties, varying by model. Typically, warranties cover parts and labor for one year, with extended options available. Review your specific warranty documentation for details on coverage and claim procedures.
Kenmore’s Customer Care is readily accessible through their website, offering FAQs, repair information, and contact options. Prompt assistance is available via phone or email. Transform SR Brands LLC, the owner of the Kenmore trademark, provides dedicated support. Access terms of use, privacy policies, and interest-based ad information on their official website for a complete customer experience.
Kenmore Cleaning Technologies Explained
Kenmore appliances leverage innovative cleaning technologies for superior results. Wash Motions utilize spraying, agitation, and wash basket action – sometimes simultaneously – to thoroughly clean clothes. This multi-faceted approach targets different soil types and fabric sensitivities.
Quad Action Impeller Technology, found in select models, employs four strategically positioned impellers to create a dynamic wash environment. This generates powerful currents, lifting and tumbling clothes for enhanced cleaning. These technologies, built on over a century of appliance innovation, ensure Kenmore delivers effective and efficient cleaning performance, adapting to various laundry needs.
Wash Motions (Spraying, Agitator, Wash Basket)
Kenmore washers utilize a variety of wash motions to optimize cleaning performance. Spraying directly targets clothes with water and detergent, pre-treating stains and loosening dirt. The agitator, present in some models, creates a twisting motion, physically scrubbing clothes against each other. Simultaneously, the wash basket rotates, ensuring even distribution and thorough saturation.
These motions often work in concert, adapting to the selected wash cycle. This combination effectively removes soil, while minimizing fabric wear. By employing multiple approaches, Kenmore ensures a comprehensive clean, catering to diverse fabric types and laundry loads. This technology is a cornerstone of Kenmore’s commitment to effective cleaning.
Quad Action Impeller Technology
Kenmore’s Quad Action Impeller represents a significant advancement in washing machine technology. Unlike traditional agitators, the impeller features four strategically designed vanes. These vanes create a dynamic water flow, gently but effectively lifting and tumbling clothes within the wash basket.
This motion provides superior cleaning, even with bulky items, while being kinder to fabrics. The impeller’s design maximizes water and detergent contact, resulting in a more thorough wash. Up to four wash motions are utilized, enhancing stain removal and overall cleanliness. This innovative system delivers powerful performance with reduced wear and tear on your garments.
Understanding Error Codes
Kenmore washers and dryers utilize error codes to diagnose issues, simplifying troubleshooting. These codes appear on the control panel display, indicating a specific problem within the appliance. Refer to this section to decipher these signals and attempt basic solutions before contacting service.
Common washer codes might indicate issues with water supply, drainage, or unbalanced loads. Dryer codes often relate to heating element failures, venting obstructions, or sensor malfunctions. Always consult the complete error code list in the appendix of this manual for a detailed explanation of each code and recommended actions. Ignoring error codes can lead to further damage.
Parts and Replacement Information
Genuine Kenmore replacement parts are crucial for maintaining your stackable washer and dryer’s performance and warranty validity. Using non-approved parts may void your coverage and potentially damage the appliance. To locate specific parts, have your model and serial number readily available.
You can order parts directly through the Kenmore Customer Care website or by contacting their service line. Many common components, like belts, filters, and pumps, are readily available. Always prioritize safety when replacing parts; disconnect power before any repair attempt. Diagrams and detailed instructions are often available online to guide the replacement process.
Frequently Asked Questions (FAQ)
Q: Why isn’t my dryer heating? A: Check the gas supply (if applicable), heating element, and thermal fuse. Q: My washer isn’t draining – what should I do? A: Inspect the drain hose for kinks or clogs and clean the drain pump filter.
Q: How often should I clean the lint filter? A: After every load to maintain optimal drying efficiency and prevent fire hazards. Q: Where can I find my model number? A: It’s typically located on a sticker inside the washer/dryer door or on the back panel. Q: Is stacking safe? A: Yes, when installed correctly following the provided instructions.